How to Make Effective Graphics!
This is a Genius Hour tutorial on how to make effective graphics.
Since there's too much to cover about doing this, I'm just gonna scratch the surface on the basics on using GIMP.
You Will Need:
Instructions:
- If not done already, go to File > New and make the image how big as you want it to be.
Learning the Basics:
Bucket Fill Tool:
- Go to the "Bucket Fill Tool". (looks like this:
 )
) - Make the "Fill Type" (under Tool Options:
 ) be either the "FG color fill", "BG color fill", or "Pattern fill".
 - FG color fill: Makes the fill color be whatever color is chosen on the Swatches:
 - the color you chose overwriting the Black space.
 - BG color fill: Makes the fill color be whatever color is chosen on the Swatches: - the color you chose overwriting the White space.
- To change the FG color fill or BG color fill, click on the said space to pick a color you want. When done, click "OK".
- Also, you will see a space called "HTML notation". You can also edit this, the most efficient way is to use this HTML color picker.
- Pattern fill: Makes the fill be whatever pattern is chosen. While this choice is selected, double click on the default pattern:
 to change it.
 - You can play with the "Fill whole selection" and "Fill similar colors" options if you want... If you're unsure, don't mess with this or the "Finding Similar Colors" options.
- Now click anywhere on your canvas to fill the background with whatever color you chose. You now know how to change this.
Crop Tool:
- Go to the "Crop Tool". (looks like this:
 )
) - With this, you can drag on your canvas to crop any unwanted parts of your picture.
- Press Enter to crop your picture.
Eraser Tool:
- Go to the "Eraser Tool". (looks like this:
 )
) - Anything that you don't like on your canvas can now be erased. Just click on the parts of your canvas that you don't like, and it will disappear.
Gradient Tool:
- Go to the "Gradient Tool". (looks like this:
 )
) - Look at the "Tool Options". (looks like this: )
- By default, the gradient goes from "FG to BG". (Foreground to Background.) For information about changing the color, please see the "Bucket Fill Tool" section starting at "Step 2".
- You can swap the "FG to BG" (Foreground to Background.) by pressing the Swap Button.

- The Shape can be changed as well. Just click this button:
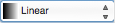 to change the type of gradient.
 - When you set everything up how you want it to be, click on your canvas and at the same time, drag your cursor to a different part of the canvas. How you drag it can change how the gradient looks.
Paintbrush Tool:
- Go to the "Paintbrush Tool". (looks like this:
 )
) - With this, you can click and drag on your canvas to color on it.
- The paintbrush color is the color used by your Foreground. For information about changing the color, please see the "Bucket Fill Tool" section starting at "Step 2".
- Look at the "Tool Options". (looks like this: )
- You can mess with the Opacity under "Mode" by clicking on the arrow buttons or clicking on "100.0" and changing the value.
- You can change the brush by clicking on the button under "Opacity". (looks like this:
 )
) - You can change the size under "Brush" by clicking on the arrow buttons or clicking on "20.0" and changing the value.
Pencil Tool:
- Go to the "Pencil Tool". (looks like this:
 )
) - With this, you can click and drag on your canvas to color on it.
- The pencil color is the color used by your Foreground. For information about changing the color, please see the "Bucket Fill Tool" section starting at "Step 2".
- Look at the "Tool Options". (looks like this: )
- You can mess with the Opacity under "Mode" by clicking on the arrow buttons or clicking on "100.0" and changing the value.
- You can change the brush by clicking on the button under "Opacity". (looks like this: )
- You can change the size under "Brush" by clicking on the arrow buttons or clicking on "20.0" and changing the value.
Text Tool:
- Go to the "Text Tool". (looks like this:
 )
) - Look at the "Tool Options". (looks like this: )
- Under "Text" to the right of this image:
 ) you will see a space to write text where you can type the name of any font installed on your computer. When you finished typing in the name of the font, press the Enter key on your keyboard.
 - Under that, there's a "Size" option. You can change the size of your text here.
- There's also a "Color" section. You can double click this to change your font color. For information about changing the color, please see the "Bucket Fill Tool" section starting at "Step 2".
- There's also a Justify option to change the direction the text is. Left Justified (looks like this:
 ) makes your text go left to right.